Monday, February 15, 2016

Κεμπάπ με σπιτικές πίτες


 Υλικά συνταγής

1/4 κιλό αρνί   κιμά

1/4 κιλό  κιμά μοσχάρι


1  κρεμμύδι ξερό τριμμένο
1 πιπεριά Φλωρίνης   λιωμένη
1/2 ματσάκι μαϊντανό ψιλοκομμένο
2 κ.σ. ξίδι

1/2 φλ. τσαγιού ελαιόλαδο
1/2 φλ. τσαγιού νερό

1 κ.σ. τσιμένι
1 κ.σ. κύμινο
1 κ.σ. πάπρικα
1 κ.σ. κόκκινο πιπέρι καυτερό (καγέν)


αλάτι 
πιπέρι

Για τις   πίτες
1/4 κιλό αλεύρι
1/4 φακελάκι ξηρή μαγιά
1/3 κ.γλ. αλάτι
1/3 κ.γλ. ζάχαρη
περίπου 1  ποτήρι χλιαρό νερό


Μαγείρεμα


Ζυμώνουμε το μείγμα στο μίξερ με γάντζο,πρώτα άζουμε τον κιμά την πιπεριά , τα κρεμύδια , μαιντανό ξίδι , κύμινο , τσιμένι, πάπρικα, καγέν, αλάτι , πιπέρι και ζυμώνουμε για 10 λεπτά Βάζουμε το μίγμα στο ψυγείο  3 ώρες.
 
Οι πίτες.


Αφού κοσκινίσουμε το αλεύρι, προσθέτουμε   τα υπόλοιπα υλικά  .

Ανακατεύουμε ρίχνωντας λίγο νερό, μέχρι η ζύμη να μην κολλάει στο χέρι.


Την αφήνουμε  να διπλασιαστεί σε όγκο για περίπου 1 ώρα.

Επαναλαμβάνουμε το ζύμωμα και παίρνουμε ένα κομμάτι περίπου 100 γρ και το  ξαναζυμώνουμε και  το ανοίγουμε σε πίτα (πίτα για σουβλάκι).

Σε ζεστό  αντικολλητικό τηγάνι και σε λιγο χαμηλή θερμοκρασία, χωρίς λάδι, ψήνουμε κάθε πίτα για 3΄-4΄από κάθε πλευρά.

Μπορούμε να   ψήσουμε τίς πίτες και στη σχάρα.

Σε σουβλ για    πλακέ  βάζουμε 120 γρ κιμά με  μακρόστενο  σχήμα.

Τα ψήνουμε στη σχάρα, για 8΄-10΄ κάθε πλευρά.
Κόβουμε  τις  πίτες στα 4, ψημένες φέτες ντομάτας, ροδέλες κρεμμυδιού και πασπαλίζουμε με πάπρικα. 

Σερβίρετε και ένα μπολ με γιαούρτι η γιαούρτι και τζατζίκι 

Σφολιάτα της Δανίας


 http://gracessweetlife.com/2012/10/cherry-danish-pastries-dolci-di-pasta-sfoglia-danese-alla-ciliegia/

Danish Pastry Dough {Σφολιάτα της Δανίας}

Makes 971 g (2.14 pounds) of pastry dough

Sweet Dough – Base Dough {Pastello or Détrempe}

  • 220 ml (1 cup – 1 tablespoon) warm whole milk, between 40° C and 43° C (105° F and 110° F)
  • 57 g (¼ cup) caster (superfine) sugar, divided
  • 8 g (2 1/8 teaspoons) instant yeast (quick rise)
  • 250 g (2 cups) plain (all-purpose) flour
  • 250 g (2 cups) bread flour
  • 3 g (½ teaspoon) salt
  • 2 large eggs, lightly beaten with a fork
  • 71 g (5 tablespoons) unsalted butter, melted and cooled
  • Seeds from 1 vanilla bean
  1. In bowl of stand mixer, whisk together milk and 1-teaspoon sugar. Add the yeast and whisk together. Let stand at room temperature, 5 minutes.
  2. Add the flour, the remainder of the sugar, salt, eggs, butter and vanilla seeds. Attach bowl to mixer and fit with paddle attachment. Mix together on low speed until just combined, 1 minute.
  3. Replace paddle attachment with dough hook attachment. Mix on low speed until soft dough forms (sticky) and dough begins to clean up the sides of the bowl, about 15 minutes.
  4. Remove bowl from mixer. Scrape down any dough remaining on the sides and bottom of bowl with a dough scraper and form into a ball (inside of the bowl). Remove from bowl, lightly dust bowl with flour. Return dough to bowl, cover with a kitchen towel. Let stand in a warm place away from drafts, 30 minutes.
  5. Line rimmed baking sheet with non-stick baking paper. Lightly dust with flour.
  6. Transfer the dough using a dough scraper onto prepared baking sheet. Cover with a sheet of non-stick baking paper and then plastic wrap. Transfer too refrigerator, chill, at least 2 hours and up to overnight.
  7. Prepare roll-in fat (see below).
  8. Remove pastry dough from refrigerator. Transfer pastry dough to a clean work surface lightly dusted with flour. Lightly dust rolling pin and the surface of the dough.
  9. Roll dough into a 28 cm (11-inch) square. Remove plastic wrap from butter packet and place diagonally on top of the dough square. Fold one outside corner of dough in toward the centre and bring the opposite corner of dough in and over so that the two corners meet and overlap. Pinch edges of dough to seal. Repeat with the other two corners. Butter should be completely enclosed and the edges completely sealed.
  10. Using a rolling pin, gently tap the dough, starting from the centre of the dough and going outward, until the square becomes larger and the butter begins to soften. Roll the dough into a 36 cm (14-inch) square, checking often to make sure dough is not sticking to your work surface; lightly dust with flour as needed. (When rolling the dough it’s important to roll in long movements to ensure the butter is evenly distributed to the edges of the pastry, refrain from rolling in short, back and forth movements.)
  11. Each time before folding and rolling the pastry dough it’s important to brush any excess flour from the surface.
  12. To perform the first single-fold or letter-fold, visually divide the sheet of pastry into thirds. Fold one of the outer thirds of pastry over the middle third of pastry. Fold the remaining outer third of pastry over the folded dough (like folding a business letter). Folding the pastry dough in this manner triples the number of layers in the dough each time. (When folding the dough make sure the corners meet and the edges are perfectly aligned.) Wrap the pastry dough in plastic and refrigerate, 30 minutes. (Chilling the pastry is essential because it allows the dough to relax and also allows the butter to firm up again.)
  13. Rotate the pastry 90 degrees and roll out and fold the pastry again as before. (With each fold, it’s important to rotate the pastry 90 degrees from the previous one before rolling. This ensures the gluten is stretched equally in all directions making the pastry dough much easier to roll and it will also ensure the pastry will rise properly.) The second single-fold is complete. Wrap the pastry dough as before and chill again, 30 minutes.
  14. To perform the last single-fold, rotate pastry 90 degrees and roll out and fold the pastry again as before. Wrap pastry in plastic and chill, 1 hour. (If not using immediately, pastry dough can be stored, well wrapped, in the refrigerator for 3 days.
  15. Line 5 rimmed baking sheets with non-stick baking paper. Prepare egg wash. Remove pastry dough from refrigerator and transfer to a lightly floured work surface. Cut the pastry in half. Working with one piece of pastry dough at-a-time keeping the remaining piece refrigerated.
  16. Lightly dust the surface of the pastry dough and rolling pin with flour. (See below for rolling, trimming, cutting and shaping pinwheel Danish pastries and snail Danish pastries. An important tip for you, when trimming and cutting pastry, if using a pastry wheel, roll in one direction, if using a knife, cut straight down, do not use a sawing motion. This tip will ensure a good rise because it prevents pinching of the pastry.)
  17. Viennoiserie (sweet yeasted laminated dough – Danish, croissant and brioche) are typically egg washed twice. Once after shaping and again just before baking. Egg washing the pastry prevents a skin from forming on the pastry and it also enhances the colour of the crust. Very carefully apply a thin coat (pastry is very delicate, take care not to deflate or damage the shaped pastry) of egg wash on each shaped pastry with a pastry brush (soft bristles is best) making sure it does not pool on or around the base of the pastry.
  18. To proof pastry (final dough rise), cover with plastic wrap (I usually place some liqueur glasses around the pastry to allow room for the pastries to rise. This also prevents the plastic from touching the pastry). Place in a warm spot away from drafts and allow pastries to proof 90 minutes and up to 2 hours (depending on the temperature of the room). (For extra good measure I drape a warm towel over top.) If you prefer, at this point the shaped pastry can be refrigerated overnight and proofed in the morning. Keep in mind proofing may take longer after refrigeration.
  19. To bake pastries, preheat oven to 190° C (375° F). Apply a second thin coat of egg wash with a pastry brush. Carefully degas the centre of each pastry by pressing down with the back of a demitasse spoon (small spoon) in preparation for filling. Spoon filling into the centre of each pastry. Spritz the surface of the pastry with water and bake until golden, about 20 minutes.
  20. Transfer to wire rack. Apply a thin coat of cherry glaze with a pastry brush. Let cool on the baking sheet for 2 minutes. Remove from baking sheet and transfer to a wire rack placed on top of a sheet of non-stick baking paper. Let stand until completely cooled.
  21. Using a squeeze bottle apply icing in a zigzag motion.

Roll-In Fat {Panetto or Beurrage}

  • 339 g (1½ cups or 3 sticks) unsalted butter
  • 3 tablespoons flour
  1. Sprinkle half of the flour onto a sheet of non-stick baking paper. Arrange the butter sticks in an even layer (touching) on top of the flour. Sprinkle the remaining flour over the butter sticks.
  2. Place a second sheet of non-stick baking paper on top of the butter sticks. Using a rolling pin hit the butter to soften it forming 18-cm (7-inch) square. Cover butter packet with plastic wrap. Chill in the refrigerator until firm, at least 30 minutes.

To Cut and Shape Pinwheel Danish Pastries

  1. Roll the pastry dough into 39-cm (15¼-inch) square. Using pastry wheel or sharp knife, trim 6-mm (¼-inch) off the edges of the square. Brush away any excess flour with a pastry brush.
  2. Cut the pastry dough into nine 13 cm (5-inch) squares. Working with one dough square at-a-time, cut slits from the corners in toward the centre (essentially creating four triangles within the square) making sure to not cut through the centre. Fold the right tip of each triangle into the centre and press down to secure the shape. Transfer pastries (6 per sheet) to prepared baking sheet. Continue with step 17 above.

To Cut and Shape Snail Danish Pastries

  1. Roll the pastry dough into 41-cm (16¼-inch) square. Using pastry wheel or sharp knife, trim 6-mm (¼-inch) off the edges of the square. Brush away any excess flour with a pastry brush. Fold the pastry dough in half.
  2. Cut the pastry dough into twenty 2 cm (¾-inch) wide strips.
  3. Working with one folded strip at-a-time, very gently stretch the pastry about 30 cm or 12-inches long.
  4. Use your index finger to secure the open end of the pastry strip to the work surface (this becomes the centre point of the pastry). Twist the pastry strip with your free hand. Wrap the twisted strip around the centre point and secure the tail under the pastry. Transfer pastries to prepared baking sheet (6 per sheet). Continue with step 17 above.

Egg Wash

  • 1 large egg
  • 2 tablespoons whole milk
  1. In a small bowl, blend together egg and milk with a fork.

Danish Pastry Filling

Every summer I prepare and can my own cherry pie filling. It’s ironic because I use the pie filling for everything from turnovers to pastry fillings and cheesecake topping but not for pie filling. Store-bought cherry pie filling (one works great too or fill the pastries with your favourite jam or pastry cream with fresh fruit.

Cherry Glaze {Glassa alla Marmellata di Ciliegie}

  • 80 ml (1/3 cup) cherry jelly (or apricot jam)
  • 1 tablespoon water
  1. In a small saucepan over low heat, bring jelly and water just to a simmer, stirring to combine well.
  2. Strain through a fine mesh sieve into a small bowl.

Danish Pastry Icing {Glassa di Zucchero}

Depending on how much icing you drizzle over each pastry you may have to make a second batch of the icing. I would recommend starting with one and if needed, prepare a second batch. This will also prevent the icing from getting to thick, which makes it difficult to drizzle.
  • 2 tablespoons milk
  • 125 g (1 cup) confectioners’ sugar, sifted
  1. Place milk into a small, deep bowl.
  2. Add confectioners’ sugar; stir to well combine (make sure there are no lumps).
  3. Transfer to a squeeze bottle.


Tuesday, February 9, 2016

Ραβανί γιαουρτόπιτα by kyriakouli


Ραβανί by kyriakouli

Υλικά

    0.5 Kgr  σιμιγδάλι ψιλό
    2 κούπες  ζάχαρη
    2 ασπράδια αυγά  χτυπημένα μαρέγκα
    0.5 Kgr   γιαούρτι
    1.5   κουταλάκι του γλυκού σόδα      
    1 φέτα λεμόνι κατά προτίμηση ξύσμα
    1   πορτοκάλι στυμένο 125  gr


    ινδοκάρυδο για το πασπάλισμα

    σιρόπι
    3 ποτηρια νερό
    1 ποτήρι ζάχαρη


 Εκτέλεση Συνταγής
 1

Χτυπάμε στο μίξερ τα ασπράδια αυγά με την μία κούπα ζάχαρη για 3-4 λεπτά μέχρι να ασπρίσουν.

 2

Προσθέτουμε το σιμιγδάλι, το γιαούρτι, τη σόδα, το μπέικιν και συνεχίζουμε να χτυπάμε μέχρι να διαλυθούν καλά τα υλικά μας.
3

 
Βουτυρώνουμε ένα πυρέξ και αδειάζουμε μέσα το μείγμα μας. Ψήνουμε στο φούρνο στους 180 βαθμούς για 35-40 λεπτά περίπου. Ελέγχουμε αν έχει ψηθεί από μέσα τρυπώντας το ραβανί με μία οδοντογλυφίδα.

4

Αφού ψηθεί το ραβανί το αφήνουμε στην άκρη να κρυώσει και ετοιμάζουμε το σιρόπι. Σε ένα κατσαρολάκι βάζουμε το νερό, το 1 φλιτζάνι του τσαγιού ζάχαρη και τη φέτα από το λεμόνι και τα βράζουμε για 5 λεπτά από το σημείο του βρασμού.
5

Μόλις είναι έτοιμο το σιρόπι μας και ενώ έχει κρυώσει το ραβανί μας το κόβουμε και το σιροπιάζουμε. Πασπαλίζουμε με ινδοκάρυδο και σερβίρουμε αφού κρυώσε
ι


Sunday, February 7, 2016

Cauliflower Buffalo Wings:

 http://www.wellplated.com/cauliflower-buffalo-wings-blue-cheese-avocado-dip/


Ingredients:

For the Cauliflower Buffalo Wings:

  • 1/2 cup white whole wheat flour (or swap additional all purpose flour)
  • 1/2 cup all purpose flour
  • 2 teaspoons garlic powder
  • 7 cups cauliflower florets (about 24 ounces)
  • 3/4 cup Buffalo wing sauce (I used Frank’s)
  • 1 tablespoon unsalted butter

For the Blue Cheese Avocado Dip:

  • 1 medium ripe Hass avocado, pitted and diced
  • 1/2 cup non-fat plain Greek yogurt
  • 1 clove minced garlic
  • 2 teaspoons fresh lemon juice
  • 1/4 teaspoon black pepper
  • 2-4 tablespoons crumbled blue cheese, to taste

Directions:

  1. Preheat the oven to 450 degrees F. Line a large baking sheet with foil, then coat with non-stick spray.
  2. In a large bowl, stir together the white whole wheat flour, all purpose flour, and garlic powder. Pour in 1 cup of water, then stir until smooth. Add the cauliflower to the bowl, then toss to coat.
  3. Spread the cauliflower in a single layer on the prepared baking sheet, shaking off any excess batter. Spread the cauliflower out so that the florets do not touch. Bake until lightly browned, 18-20 minutes.
  4. Meanwhile, in a small saucepan, combine the Buffalo sauce and butter over medium low heat. Stir until the butter melts, then set aside.
  5. Once the cauliflower has finished baking, remove it from the oven and pour the buffalo sauce over the top, using the entire saucepan. Toss to coat, using a spatula if the cauliflower is too hot so that you don’t burn your fingers. Return the cauliflower to the oven, then bake for 5 additional minutes, watching carefully so that the sauce does not brown too much on the outside. Serve hot with the Blue Cheese Avocado Dip.
  6. For the Blue Cheese Avocado Dip: mash the avocados in a medium bowl with the Greek yogurt, garlic, lemon juice, and pepper. Add 2 tablespoons blue cheese and stir to incorporate, the taste, adding extra blue cheese as desired. Cover and refrigerate until ready to serve.

Starbucks® Lemon Bread

Starbucks® Lemon Bread

 http://allrecipes.com/recipe/236779/copycat-of-starbucks-lemon-bread/


Ingredients

1 h 55 m 12 servings 477 cals

On Sale

What's on sale near you.
Hmm. It looks like these ingredients aren't on sale today.

Directions

Print

  1. Preheat oven to 350 degrees F (175 degrees C). Grease 2 loaf pans.
  2. Combine cake mix, pudding mix, oil, eggs, sour cream, milk, and 6 tablespoons lemon juice into bowl of stand mixer; beat for 2 minutes and pour into prepared loaf pans.
  3. Bake in the preheated oven until a toothpick inserted into the center comes out clean, about 50 minutes. Cool in the pans for 20 minutes before removing from pans to cool completely on a wire rack.
  4. Whisk confectioners' sugar and 3 tablespoons lemon juice together in a bowl until smooth; spoon evenly over the loaves and let set before slicing, about 30 minutes.

How to Make Roasted Broccoli

How to Make Roasted Broccoli 


Parmesan Broccoli Balls

Parmesan Broccoli Balls

 http://allrecipes.com/recipe/41116/parmesan-broccoli-balls/


Ingredients

1 h 40 m 36 servings 72 cals

On Sale

What's on sale near you.
Hmm. It looks like these ingredients aren't on sale today.


  1. Place broccoli in a medium saucepan with enough water to cover. Cover, and bring to a boil. Cook 5 minutes. Uncover, and continue cooking 2 to 3 minutes, until tender. Remove from heat, drain, and cool.
  2. In a large bowl, mix broccoli, stuffing mix, Parmesan cheese, onion, eggs, margarine, pepper, and garlic salt. Cover, and chill in the refrigerator approximately 1 hour, until moisture has been absorbed.
  3. Preheat oven to 325 degrees F (165 degrees C).
  4. Roll the chilled mixture into 1 inch balls, and arrange on a medium baking sheet.
  5. Bake 15 to 20 minutes in the preheated oven, until browned.


Cheesy Garlic Dinner Rolls Recipe

Cheesy Garlic Dinner Rolls Recipe

 https://www.youtube.com/watch?v=2-gkcjndI9Q


http://www.laurainthekitchen.com/recipes/dinner-rolls/


Makes 12 Rolls
Prep time: 1 hrs
Cook time: 20 mins
Ingredients:
4 cups of All Purpose Flour
¼ oz Package of Rapid Rise Yeast
1/3 cup of Granulated Sugar
1 tsp of Salt
1 cup of Milk, slightly warm
1/3 cup of Unsalted Butter, Softened
3 Egg Yolks
3 Tbsp of Unsalted Butter, melted

Process,
1) In a small saucepan, add the milk and butter and warm it just enough until the butter melts (use a candy thermometer to make sure the mixture reaches 120 degrees.)

2) In the bowl of a standing mixer fitted with a dough hook, add the warm butter and milk mixture and sprinkle the yeast over the top. Let it sit for 5 minutes.

3) To the yeast mixture, add the flour, sugar, egg yolks and salt and mix with the speed on low just until the flour is incorporated.

4) Increase the speed to medium high and kneed the dough for about 5 to 7 minutes or until it is nice and smooth and pulls away from the sides of the bowl.

5) Lightly grease a bowl with some olive oil and set aside.

6) Once the dough is nice and smooth, form into a ball and place it seam side down in the oiled bowl and grease the top and sides of the dough with a little oil as well. Cover the bowl with plastic wrap and place it somewhere warm for about an hour or until it has almost doubled in size.

7) Dump the dough onto your work surface, (flour it a little if necessary) and deflate it. Cut the dough into 12 equal pieces.

8) Cover the dough pieces with a kitchen towel as you work with one piece at a time.

9) Lightly grease a 9X13” baking dish with either butter or cooking spray and set aside.

10) Take each piece of dough and roll it in a smooth ball, place the ball seam side down in the greased baking dish, cover the baking dish with a kitchen towel so that the formed buns won’t dry out.

11) Once you have all the rolls in the baking dish, cover them with plastic wrap and allow them to sit in a nice warm place for about an hour or until they are about one and half times bigger than the original size.

12) Meanwhile, preheat the oven to 375 degrees and position one of the oven racks into the center of the oven.

13) Once the rolls have risen, bake them for about 20 to 25 minutes or until golden brown. Brush them with melted butter immediately when they come out of the oven and enjoy!


How To Make Pizza Bites for a Crowd

How To Make Pizza Bites for a Crowd


 http://www.thekitchn.com/how-to-make-pizza-bites-for-a-crowd-227489

 http://www.thekitchn.com/how-to-make-pizza-bites-for-a-crowd-227489


How To Make Pizza Bites for a Crowd


 Serves 8 to 10 as an appetizer
What You Need
Ingredients

For the sauce:
2 teaspoons olive oil
1 large shallot, minced
2 cloves garlic, minced
1/4 teaspoon salt
1 (14-ounce) can crushed tomatoes

For the pizza bites:
8 ounces low-fat, low-moisture mozzarella cheese
1 (14- to 16-ounce) ball pizza dough, store-bought or homemade
24 to 30 slices pepperoni, optional

Equipment
Chef's knife
Box grater
Pastry scraper or chef's knife
10-inch oven-safe skillet
Instructions

    Heat the oven to 400°F: Place a rack in the middle position.
    Prepare the sauce: Warm the oil in an oven-safe skillet over medium-high heat. Add the shallots and garlic, and cook until the shallots are translucent, about 5 minutes. Add the salt and the crushed tomatoes, and stir to combine. Let the sauce come to a rapid simmer, then reduce the heat to low and let it simmer while you prepare the pizza bites.
    Prepare the mozzarella: Cut the block of mozzarella in half. Cut one half of the block into 24 cubes roughly 1/2 inch in size. Grate the rest of the mozzarella on the large holes of a box grater.
    Cut the dough into pieces: Turn the pizza dough out onto a lightly floured counter. Cut the dough into 24 more or less even pieces using a pastry scraper or a chef's knife.
    Stuff the dough with cheese: Flatten one of the pieces of dough in the palm of your hand and place a cube of cheese in the middle. Wrap the dough around the cheese and pinch the seam closed. Lay the ball seam-side down on the floured counter. Repeat with the remaining pieces of dough and cubes of cheese. Flour your hands as needed to keep from sticking.
    Arrange the bites in the skillet: Remove the skillet of sauce from the heat. Carefully arrange the balls of dough in the pan, seam-side down and spaced slightly apart.
    Add the pepperoni and remaining cheese: Fold pieces of pepperoni in half and tuck them in the bites, if using. Sprinkle as much of the shredded cheese as you like over the top of the bites.
    Bake until the bites are puffed and browned: Bake 25 to 30 minutes, until the bites are puffed and golden-brown on top, the shredded cheese has melted, and the sauce is bubbling around the bites.
    Cool briefly, then serve: Cool at least 10 minutes, until the sauce is no longer bubbling and the skillet is safe to touch. Serve bites straight from the skillet.


Cauliflower Melts

Cauliflower Melts 


 http://www.epicurious.com/recipes/food/views/cauliflower-melts-56389416


Ingredients

    • 1/4 cup olive oil
    • 2 garlic cloves, minced
    • 1 teaspoon salt
    • 1/2 teaspoon freshly ground pepper
    • Medium head of cauliflower, cut into 1/2-inch-thick slabs, possibly halved to make a total of 8 slabs
    • 1/2 cup golden raisins
    • 1/4 cup white wine (optional)
    • 1/4 cup shelled pistachios
    • 8 1/2-inch-thick slices sourdough bread
    • 4 ounces Comte or Manchego cheese, cut into 8 slices
    • 2 tablespoons chopped parsley

Preparation

    1. 1. Preheat the oven to 350°F and line a baking sheet with parchment paper.
    2. 2. In a medium bowl, combine the oil, garlic, salt, and pepper. Add the cauliflower slabs and toss to coat.
    3. 3. Arrange the cauliflower on the prepared baking sheet. Bake for 25 minutes, flip the slabs, and bake another 10 to 20 minutes, until softened and roasty. Set aside to cool but keep the oven on.
    4. 4. Meanwhile, in a small bowl, soak the raisins in wine or water for 10 minutes. Drain.
    5. 5. In a small pan over medium-high heat, toast the pistachios, dry or with a little oil. Let cool on a paper towel, then chop coarsely.
    6. 6. Lay the bread on the baking sheet and arrange the cauliflower on the bread, cutting it to fit as needed. Sprinkle with pistachios and raisins and top with the cheese.
    7. 7. Bake until the cheese melts, 7 to 10 minutes.
    8. 8. Top the toasts with chopped parsley and serve immediately.

Cauliflower Fritters

Cauliflower Fritters


 https://recipes.sparkpeople.com/recipe-detail.asp?recipe=383025&utm_source=zergnet.com&utm_medium=referral&utm_campaign=zergnet_789964


Introduction

A delicious way to serve up cauliflower that is low in fat, calories & carbs!
Number of Servings: 8

Ingredients

    2 cups cooked cauliflower florets
    1 egg, beaten
    1/4 cup green onions, minced
    2 Tbsp Parmesan cheese, grated
    1/2 tsp onion powder
    1/2 tsp garlic powder
    1/2 Tbsp chopped fresh cilantro

Directions

In a large mixing bowl mash cooked cauliflower. Add egg, onion, Parmesan and spices. Mix well and form 8 fritter patties. Coat nonstick skillet with cooking spray and cook until golden brown on each side.

Makes 8 1/4-cup patties.


Thursday, February 4, 2016

Ας κάνουμε μία Σαλάτα του Καίσαρος


 Ας κάνουμε μία Σαλάτα του Καίσαρος 
 
Για τη σαλάτα:
  • 2 μαρούλια, καθαρισμένα, χωρισμένα στα φύλλα τους, ή χρησιμοποιούμε οποιαδήποτε πράσινη σαλάτα μάς αρέσει, χοντροκομμένη
  • 150 - 200 γρ. φλούδες παρμεζάνας (κομμένες με το εργαλείο που ξεφλουδίζουμε πατάτες)
Για τα κρουτόν:
  • 100 ml ελαιόλαδο
  • 1 σκελίδα σκόρδου, ψιλοκομμένη
  • 300 γρ. ψωμί, χωρίς την κόρα, σε κυβάκια του 1 εκ.
Για τη σάλτσα:
  • 120 ml ελαιόλαδο
  • 1 ολόκληρη σκελίδα σκόρδου, ξεφλουδισμένη
  • 1 κουτ. γλυκού σάλτσα Worcestershire
  • 1 κουτ. γλυκού μουστάρδα
  • 5 - 6 φιλέτα αντσούγιας σε λάδι, πλυμένα, στραγγισμένα και ψιλοκομμένα
  • 2 - 3 κουτ. σούπας ξίδι (κατά προτίμηση από κόκκινο κρασί)
  • οι κρόκοι από 2 αυγά (είτε ωμοί είτε βρασμένοι μελάτοι)
  • αλάτι, φρεσκοτριμμένο πιπέρι


 Κρουτόν: Προθερμαίνουμε το φούρνο στους 140° C. Σε ένα αντικολλητικό τηγάνι ζεσταίνουμε το ελαιόλαδο και σοτάρουμε το ψιλοκομμένο σκόρδο για 20 δευτερόλεπτα, σε μέτρια φωτιά. Προσέχουμε να μη ροδίσει το σκόρδο και πικρίσει, αλλά απλώς να αρωματίσει το λάδι. Προσθέτουμε τους κύβους ψωμιού και τους σοτάρουμε για 2 - 3 λεπτά, μέχρι να χρυσίσουν.

Μετά, τους στρώνουμε σε ένα ταψάκι και τους ψήνουμε για περίπου 20 λεπτά, μέχρι να γίνουν τραγανοί και να ροδίσουν. Τους μεταφέρουμε σε χαρτί κουζίνας και τους αφήνουμε να στραγγίξουν και να κρυώσουν. Σάλτσα: Χτυπάμε όλα τα υλικά στο μούλτι μέχρι να πάρουμε μια λεία σάλτσα, την οποία μεταφέρουμε σε ένα μεγάλο μπολ, όπου θα χωράνε και τα σαλατικά.

Σαλάτα: Ρίχνουμε στο μπολ με τη σάλτσα τα σαλατικά, ανακατεύουμε και τέλος σκορπίζουμε τις φλούδες παρμεζάνας και τα κρουτόν. Σερβίρουμε αμέσως.

Μυστικό: Αν θέλουμε να κάνουμε τη σαλάτα πιο χορταστική, προσθέτουμε 1 φιλέτο κοτόπουλου ψητό, κομμένο σε λεπτές φέτες.


Φρουτάλια ή Φουρτάλια (ομελέτα ανδριώτικη)

Απο την Καθημερινή-Γαστρονόμος


Φρουτάλια ή Φουρτάλια (ομελέτα ανδριώτικη)


Η συνταγή είναι από τον Απρόβατο και την κ. Ερριέτα Παπαϊωάννου. Ελλείψει σπιτικών εφοδίων... διαλέξτε από το εμπόριο νόστιμα χωριάτικα λουκάνικα και, αντί για το ντόπιο τυρί βολάκι, μια ξερή μυζήθρα ανακατεμένη με ώριμο κεφαλοτύρι.


Υλικά για 4 άτομα:
  • 4 μέτρια λουκάνικα (όχι πολύ μεγάλα, για να μη γίνει πολύ βαριά η φρουτάλια)
  • 4 μέτριες πατάτες, καθαρισμένες και κομμένες ροδέλες
  • 2/3 φλιτζ. τσαγιού τυρί τριμμένο (βολάκι ανδριώτικο ή ξερή μυζήθρα μαζί με κεφαλοτύρι)
  • 1/2 φλιτζ. τσαγιού γάλα
  • 8 αυγά, προτιμάμε βιολογικά
  • τα φυλλαράκια από 1/2 ματσάκι δυόσμο, ψιλοκομμένα
  • αλάτι και πιπέρι
  • λάδι για το τηγάνισμα


 Διαδικασία:

Σε ευρύχωρο τηγάνι, κατά προτίμηση αντικολλητικό, βάζουμε λάδι ίσα να καλύψει τον πυθμένα και, όταν ζεσταθεί λίγο, τηγανίζουμε τα λουκάνικα ολόκληρα αφού τα τρυπήσουμε εδώ κι εκεί μ’ ένα πιρούνι, για περίπου 5 λεπτά από όλες τις μεριές. Τα βγάζουμε πάνω σε χαρτί κουζίνας και τα κρατάμε ζεστά. Προσθέτουμε λίγο λάδι ακόμα στο τηγάνι, βάζουμε τις πατάτες αλατισμένες και τις τηγανίζουμε μέχρι να μαλακώσουν.

Γέρνουμε προσεκτικά το τηγάνι και αδειάζουμε το περισσότερο λάδι. Χτυπάμε καλά τα αυγά με το γάλα, προσθέτουμε το τυρί, το δυόσμο, αλάτι και όσο πιπέρι μάς αρέσει. Ξαναβάζουμε τα λουκάνικα (ολόκληρα ή κομμένα, όπως τα θέλουμε) στο τηγάνι τοποθετώντας τα ανάμεσα στις πατάτες.

Περιχύνουμε με το μείγμα των αυγών, κλείνουμε το τηγάνι με ένα μεγάλο καπάκι (με διάμετρο μεγαλύτερη από αυτή του τηγανιού) και ψήνουμε τη φρουτάλια από κάτω σε μέτρια φωτιά. Ελέγχουμε ανασηκώνοντάς την με μια σπάτουλα. Ωστόσο θα έχει πήξει και στην επιφάνεια. Αν μπορούμε, αναποδογυρίζουμε το τηγάνι πάνω από το νεροχύτη ώστε να πέσει η φρουτάλια στο καπάκι και μετά τη σπρώχνουμε προσεκτικά ώστε να γλιστρήσει ξανά στο τηγάνι και να ψηθεί και από την άλλη.

Διαφορετικά, τη μεταφέρουμε, αφού τυλίξουμε 3 - 4 φορές το χερούλι του τηγανιού με αλουμινόχαρτο, στο γκριλ του φούρνου και ψήνουμε μέχρι να ροδίσει. Τη βάζουμε σε μια πιατέλα και την κόβουμε σαν τούρτα. Εχω δοκιμάσει και έχω υιοθετήσει τη φρουτάλια ψητή στο φούρνο. Είναι πιο ελαφριά. Βάζω τις πατάτες αλατοπιπερωμένες και λαδωμένες σε ένα καλά λαδωμένο ταψί στο φούρνο και, όταν σχεδόν ψηθούν, προσθέτω τα λουκάνικα και όταν ψηθούν τραβάω μια στιγμή το ταψί και περιχύνω το μείγμα των αυγών. Την ψήνω μέχρι να στερεοποιηθεί το αυγό.

Πολίτικο μπιφτέκι


Υλικά για 4 άτομα:
  • 500 γρ. μοσχαρίσιος κιμάς, κατά προτίμηση από ελιά
  • 2 φέτες ψωμί (χωρίς την κόρα), προτιμότερο μπαγιάτικο, τριμμένο στο μούλτι σε χοντρά ψίχουλα
  • 1 κουτ. γλυκού σόδα μαγειρικής (τη σκόνη)
  • 2 ξερά κρεμμύδια, τριμμένα, μαζί με το ζουμί τους
  • 3/4 μάτσο μαϊντανός, ψιλοκομμένος (χωρίς τα χοντρά κοτσάνια)
  • 1 γεμάτη κουτ. σούπας γιαούρτι αγελάδος, στραγγιστό
  • αλάτι, φρεσκοτριμμένο πιπέρι

 Διαδικασία:

Βάζουμε όλα τα υλικά σε ένα βαθύ μπολ και τα ζυμώνουμε με τα χέρια μας μέχρι να σχηματιστεί ένα αφράτο μείγμα. Καλύπτουμε με μεμβράνη και το αφήνουμε στο ψυγείο για 8 ώρες (ή για όλο το βράδυ). Σε αυτό το διάστημα θα δράσει η σόδα και το γιαούρτι, κάτι που θα κάνει τα μπιφτέκια πολύ αφράτα.

Προθερμαίνουμε το φούρνο στους 190° C και στρώνουμε ένα ρηχό ταψί με λαδόκολλα. Πλάθουμε μακρόστενα, κυλινδρικά μπιφτεκάκια πάχους 3 εκ. και μήκους 6 - 7 εκ., τα λαδώνουμε ελαφρώς, τα βάζουμε στο ταψί και τα ψήνουμε για περίπου 10 - 12 λεπτά ή μέχρι να γίνουν καταπώς μας αρέσουν και να ροδίσουν.

Εναλλακτικά, τα ψήνουμε στο γκριλ του φούρνου. Συνοδεύουμε με αφράτο πιλάφι και γιαούρτι στραγγιστό με πάπρικα.

Tuesday, February 2, 2016

Recette de Tarte aux pommes façon Grand-Mère - 750 Grammes

https://www.youtube.com/watch?v=22TdtieB82Q


bonne-toi à la chaîne : http://goo.gl/ORkCIK

Ingrédients pour la tarte aux pommes façon Grand-Mère :
Pour la pâte :
250g de farine
125g de beurre
40g de lait
1 jaune d’œuf
12g de sucre
3g de sel

Pour l'appareil Normand :
125g de beurre fondu
125g de sucre semoule
100g de crème liquide
4 œufs
1 gousse de vanille

Μουσακάς


Υλικά


1 κιλά μελιτζάνες φλασκες
1 φλ. τσαγιού κεφαλοτύρι
1/2 φλ. τσαγιού φρυγανιά
  ελαιόλαδο
  αλάτι


Για τον  κιμά
250 γραμμ. κιμάς μοσχαρίσιος
50 γρ κιμάς σόγια
1 κρεμμύδι ψιλοκομμένο
2 σκελίδες σκόρδο
300 γραμμ. ψιλοκομμένες ντομάτες
1  φυλλο δάφνη
1   κανέλα  
1/4 φλ. τσαγιού ελαιόλαδο
αλάτι
πιπέρι

 
Για τη   μπεσαμέλ

 
150 γραμμ. αλεύρι
1 1/2 λίτρο φρέσκο γάλα
1 μικρό κρεμμύδι
2 γαρίφαλα
1/2  κουταλάκι μοσχοκάρυδο
 
αλάτι
λευκό πιπέρι

http://www.argiro.gr

Από το άζυμο ψωμί... στα σύγχρονα καρβέλια

 http://www.penna.gr/bizarre/5386-sda


Από το άζυμο ψωμί... στα σύγχρονα καρβέλια 


Ιανουάριος 27, 2016 


Ταξιδεύουμε 30.000 χρόνια πριν όταν η ιστορία του ψωμιού στην Ευρώπη ξεκινά να γράφεται με μαύρο μελάνι. Οι πρώτες πληροφορίες έκαναν λόγο για μια εκδοχή πάστας σιτηρών, φτιαγμένης από καβουρδισμένους και αλεσμένους κόκκους δημητριακών και νερού που μπορεί να προέκυψε τυχαία κατά το μαγείρεμα ή και σκόπιμα μετά από πειραματισμό με αλεύρι ολικής αλέσεως και νερό. Το πιο πιθανό είναι να ήταν άζυμο.
Τα δημητριακά κατά τη διάρκεια της περιόδου αυτής ήταν μια από τις πολλές πηγές τροφίμων καθώς η δίαιτα των Ευρωπαίων βασιζόταν κυρίως σε τρόφιμα ζωικής προέλευσης. Τόσο τα δημητριακά όσο και το ψωμί έγιναν βασική τροφή στη Νεολιθική εποχή, περίπου 10.000 χρόνια πριν, όταν το σιτάρι και το κριθάρι ήταν ανάμεσα στα πρώτα φυτά που καλλιεργήθηκαν. Η καλλιέργειά τους εξαπλώθηκε από τη Νοτιοδυτική Ασία στην Ευρώπη, τη Βόρειο Αφρική και την Ινδική χερσόνησο και έδωσε τη δυνατότητα στους ανθρώπους να γίνουν αγρότες και όχι κυνηγοί και τροφοσυλλέκτες.
zimi 2
Το ψωμί με προζύμι έκανε την εμφάνισή του κατά τους προϊστορικούς χρόνους, οι πρώτες ωστόσο μαρτυρίες εντοπίζονται στην αρχαία Αίγυπτο. Στην αρχαιότητα η ιδέα ενός αυτοτελούς φούρνου που θα μπορούσε να προθερμανθεί, έχοντας μια πόρτα για πρόσβαση, φαίνεται να ήταν ελληνική. Στην αρχαία Ελλάδα το ψωμί ήταν κριθαρένιο.
Όπως χαρακτηριστικά είχε δηλώσει ο Σόλων, το σταρένιο ψωμί θα μπορούσε να ψηθεί μόνο σε μέρες γιορτής. Τον 5ο αι. π.Χ. μπορούσε κανείς να αγοράσει ψωμί στην Αθήνα από αρτοποιείο, ενώ στη Ρώμη, οι Έλληνες αρτοποιοί έκαναν την εμφάνισή τους τον 2ο αι. π.Χ., όταν η Μικρά Ασία πέρασε στη Ρωμαϊκή κυριαρχία. Η σημασία του ψωμιού στη διατροφή αντανακλάται και από το όνομα του υπόλοιπου γεύματος: ὄψον , δηλαδή συνοδεία ψωμιού, όποια κι αν ήταν αυτή.
zimi 3
Στο Μεσαίωνα, στην Ευρώπη, το ψωμί αποτελούσε όχι μόνο βασική τροφή, αλλά και μέρος του σερβίτσιου. Πιο συγκεκριμένα, ένα κομμάτι μπαγιάτικο ψωμί χρησιμοποιούταν σαν απορροφητικό πιάτο, που κατά την ολοκλήρωση του γεύματος μπορούσε να φαγωθεί, να δοθεί στους φτωχούς ή να ταϊστεί στα σκυλιά. Μόλις τον 15ο αι. άρχισε να αντικαθίσταται από ξύλινες πιατέλες.
Για πολλά χρόνια το άσπρο ψωμί προτιμούνταν από τους πλούσιους, ενώ οι φτωχοί έτρωγαν μαύρο (ολικής αλέσεως) ψωμί. Στις περισσότερες δυτικές κοινωνίες τα πράγματα αντιστράφηκαν στα τέλη του 20ου αι., με το ψωμί ολικής αλέσεως να προτιμάται, εξαιτίας της υψηλής διατροφικής του αξίας, σε αντίθεση με το άσπρο που συνδέθηκε με άγνοια για τη διατροφή.
zimi 4
Η βιομηχανοποίηση του ψησίματος του ψωμιού στη σύγχρονη εποχή ήταν ένα καθοριστικό βήμα για το σύγχρονο κόσμο. Ο Otto Frederick Rohwedder θεωρείται ο πατέρας του ψωμιού σε φέτες (1912), αφού το 1928 κατάφερε να εφεύρει μια μηχανή που τεμάχιζε και τύλιγε το ψωμί σε συσκευασία.
zimi 5
Το 1961 αναπτύχθηκε η μέθοδος Chorleywood, που χρησιμοποιούσε την έντονη μηχανική επεξεργασία της ζύμης για να μειώσει δραματικά την περίοδο της ζύμωσης και τον χρόνο που απαιτείται για να παραχθεί μια φραντζόλα, σε βάρος όμως της γεύσης και της θρεπτικής αξίας. Αυτή η διαδικασία χρησιμοποιείται πλέον στα μεγάλα εργοστάσια παγκοσμίως.
zimi 8
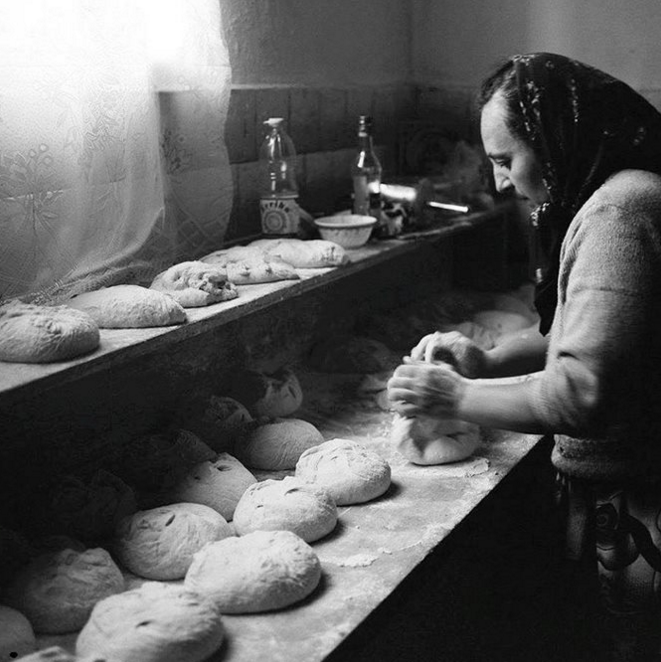
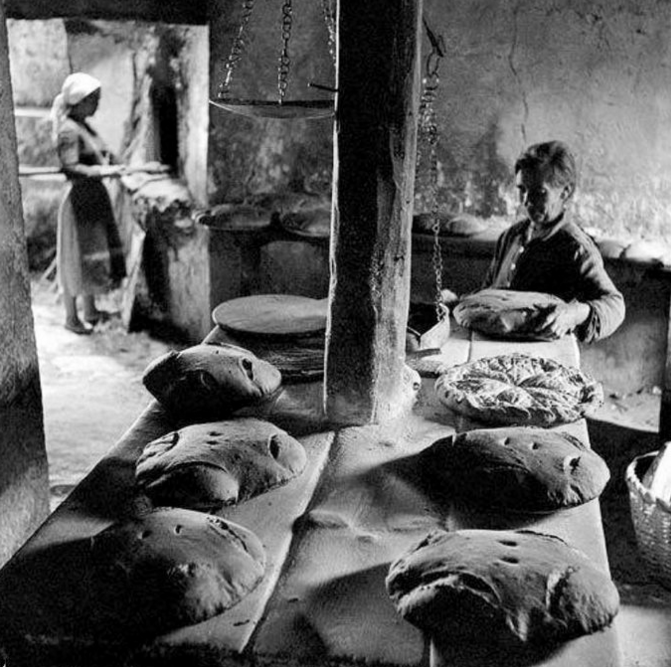
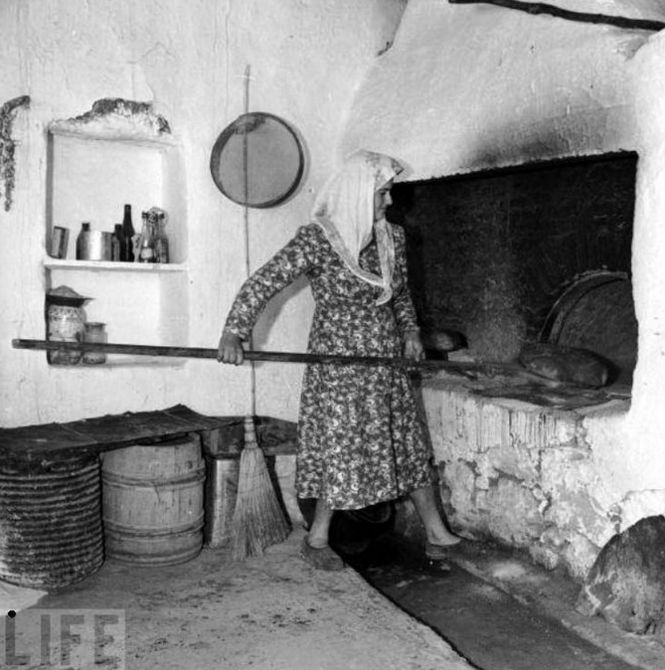
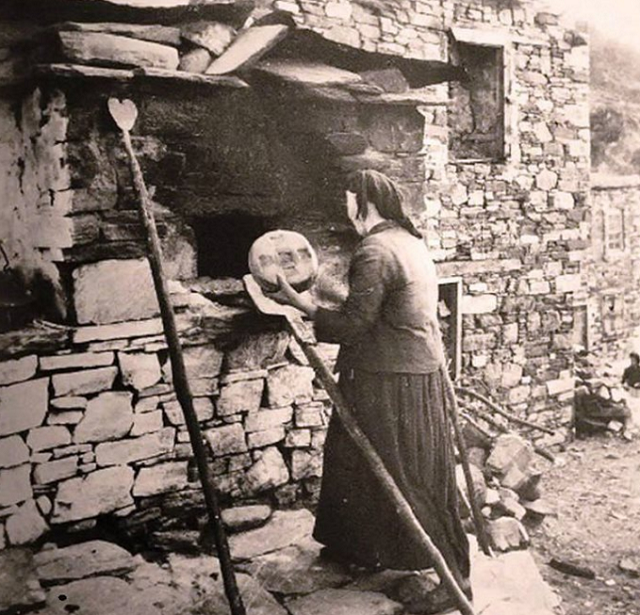
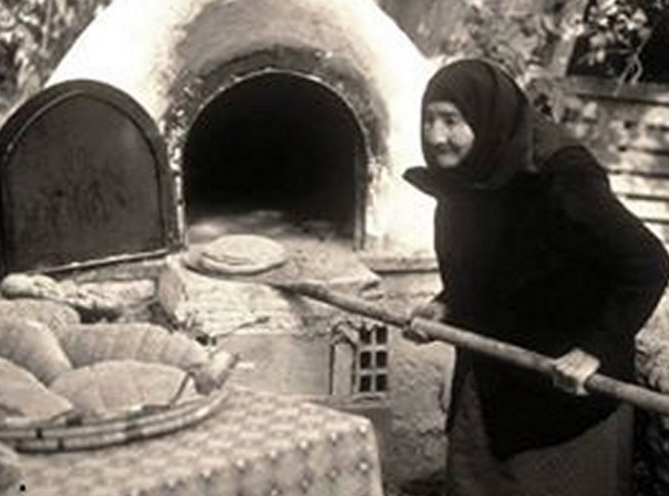
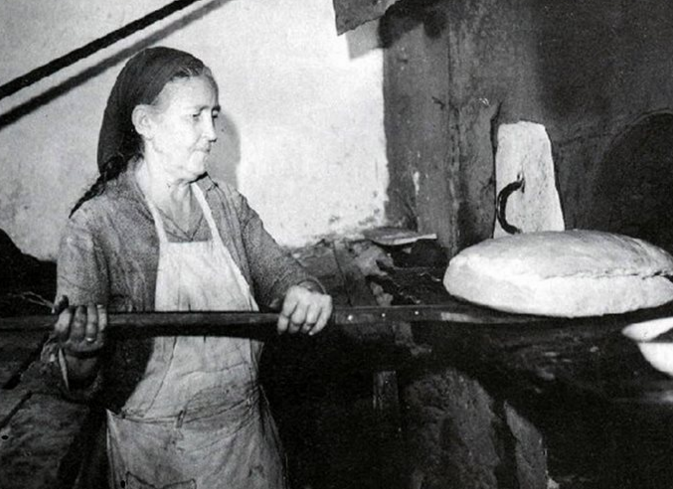
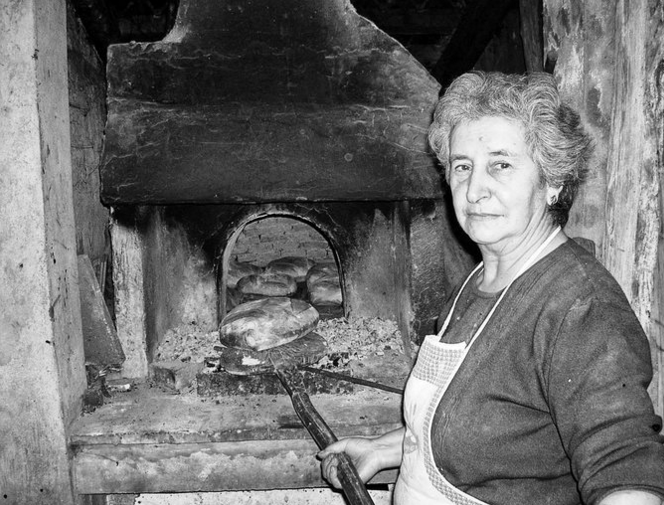
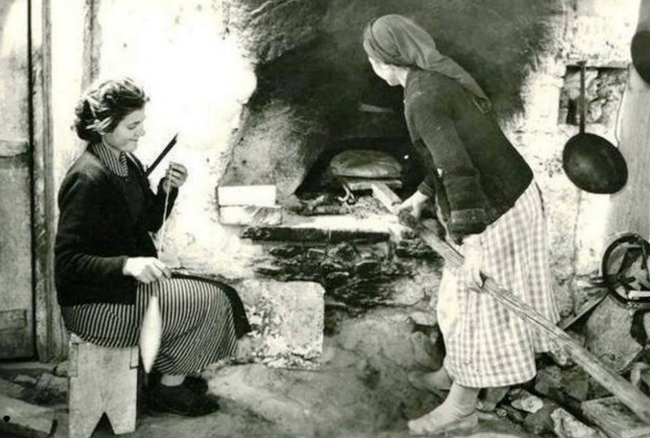
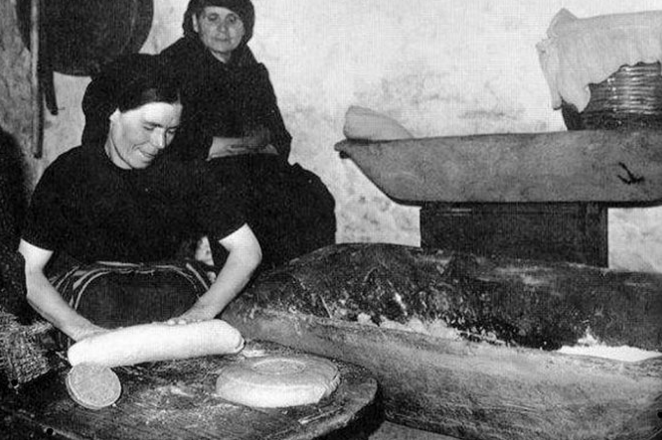
Τα παραδοσιακά αρτοποιεία αντιθέτως σπαταλούν πολύ χρόνο για την παρασκευή, καθώς η ζύμη αναμειγνύεται με την μαγιά και απαιτεί πολλούς κύκλους ζυμώματος και ανάπαυσης, προκειμένου να καταστεί έτοιμη για ψήσιμο και να παράγει την επιθυμητή γεύση και υφή.
zimi 10
Πιο πρόσφατα, και ειδικά σε μικρά αρτοποιεία, χημικά πρόσθετα χρησιμοποιούνται για να επιταχύνουν το χρόνο ανάμιξης και να μειώσουν τον χρόνο ζύμωσης με αποτέλεσμα μια παρτίδα ψωμιού να μπορεί να παρασκευαστεί και να ψηθεί σε λιγότερο από τρεις ώρες.
zimi 11
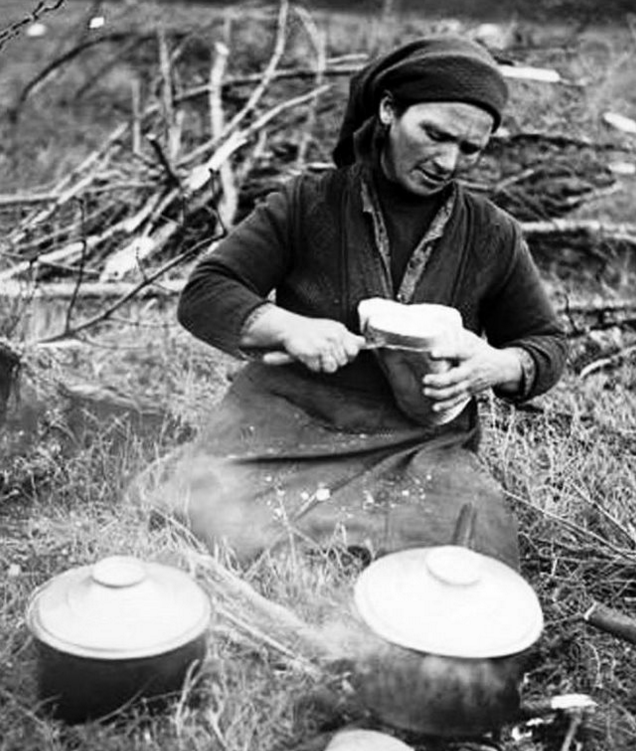
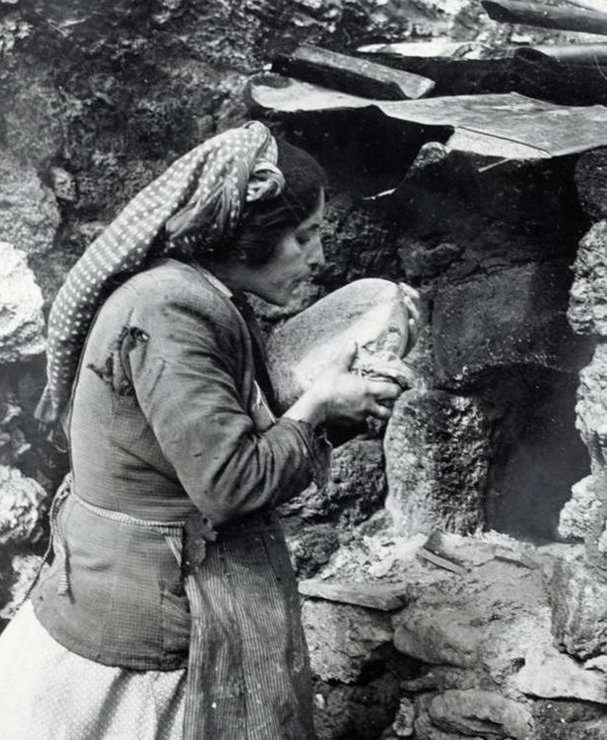
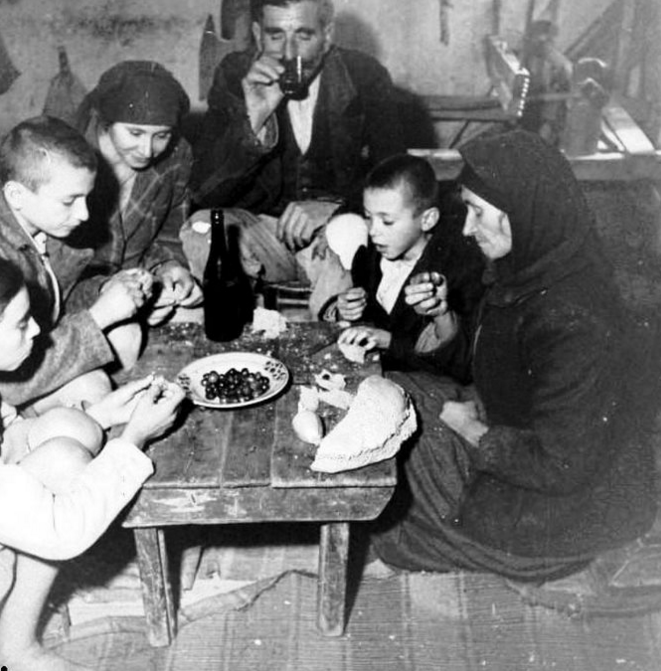
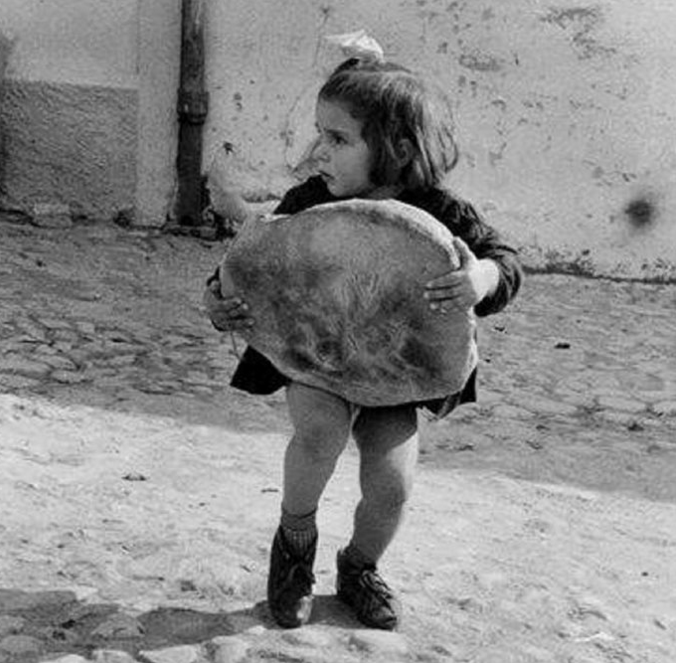
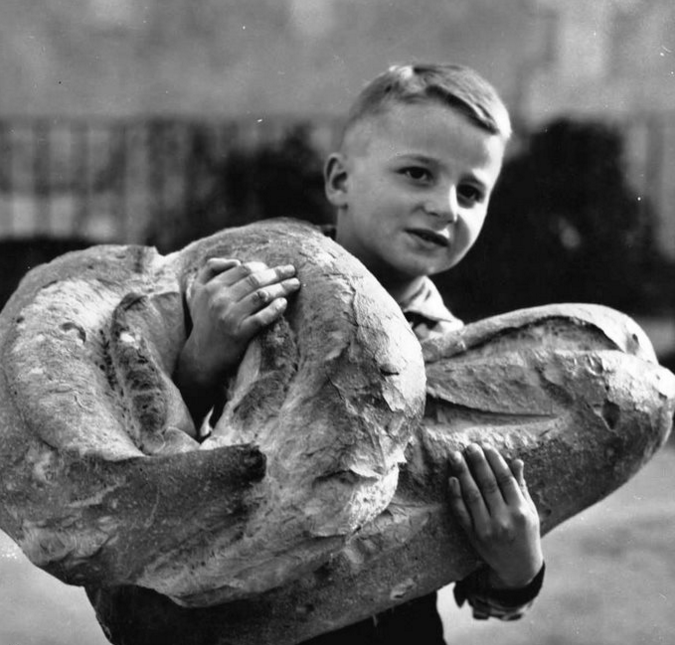
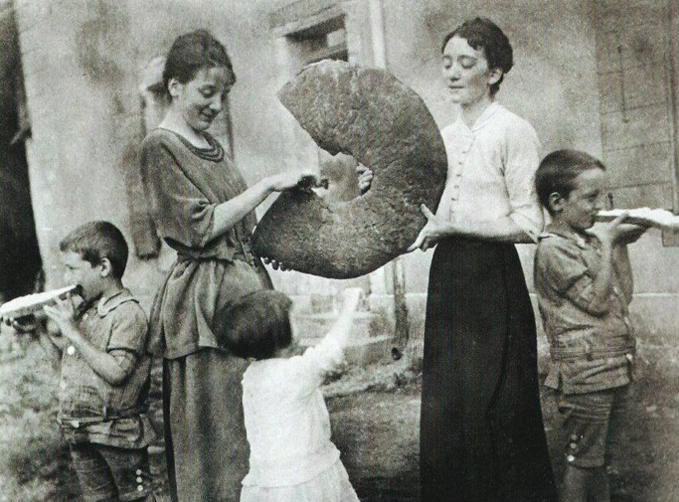
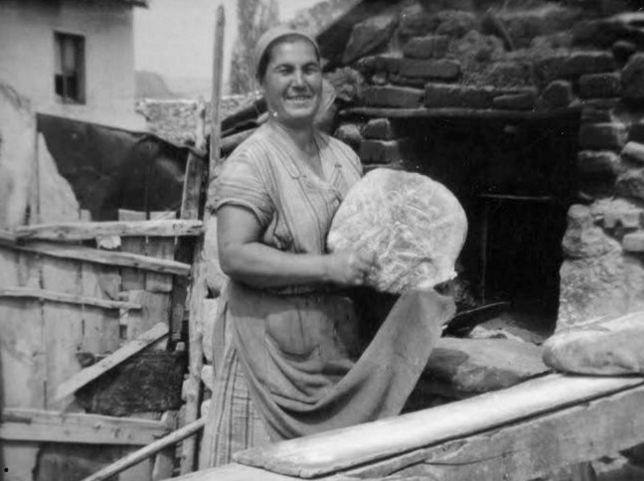
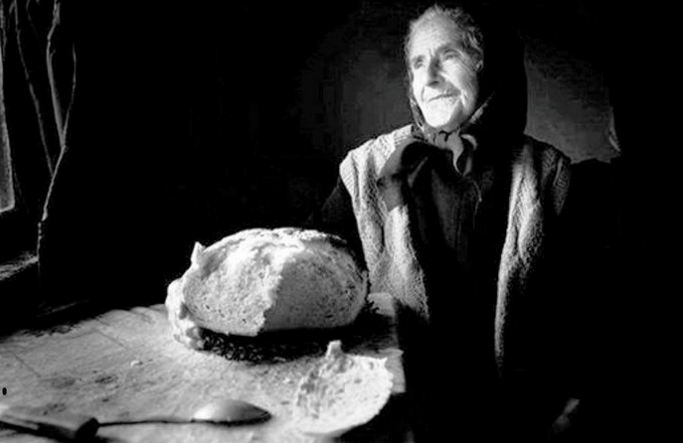
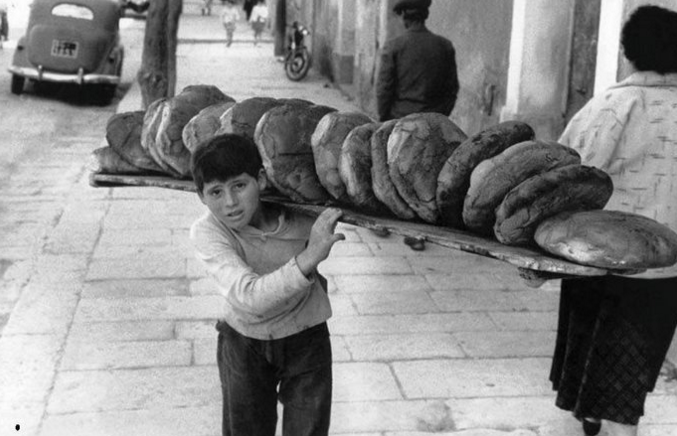
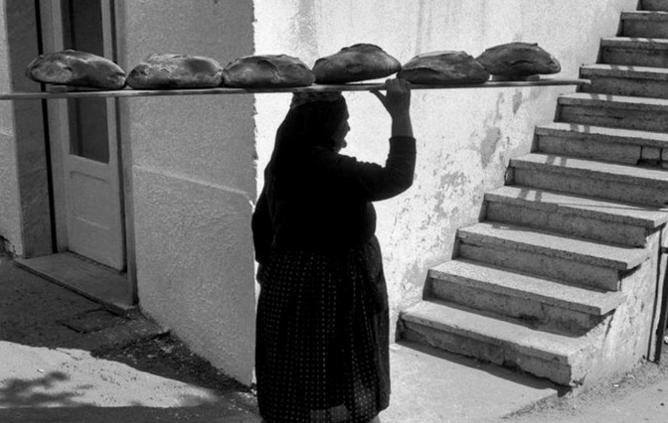
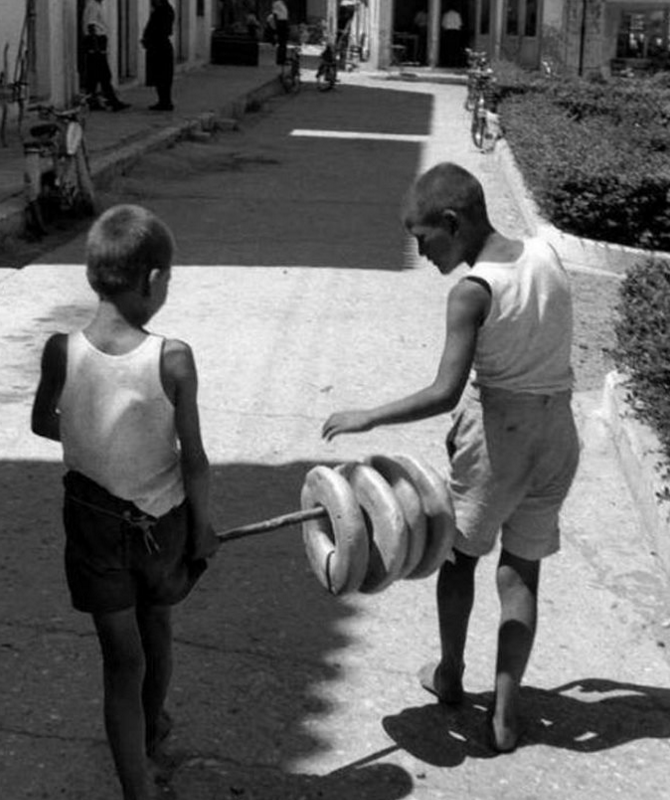
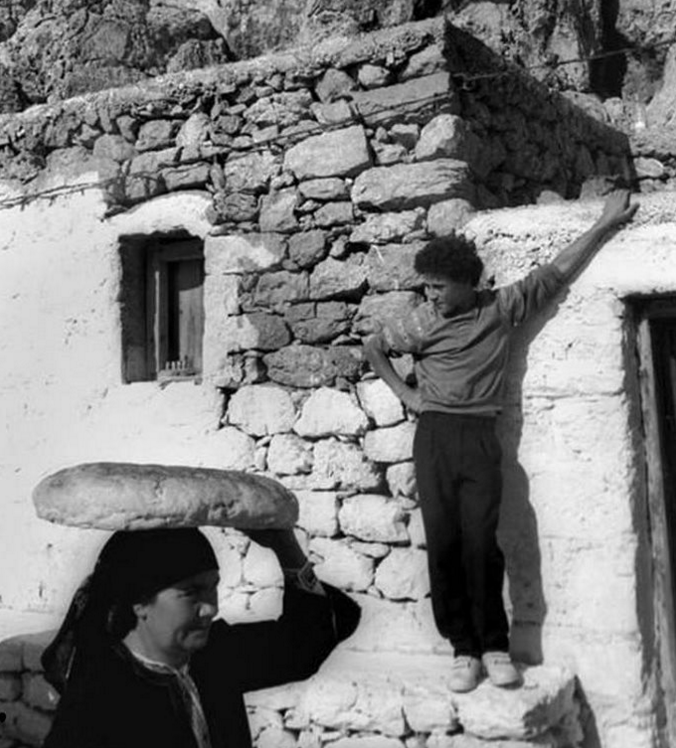
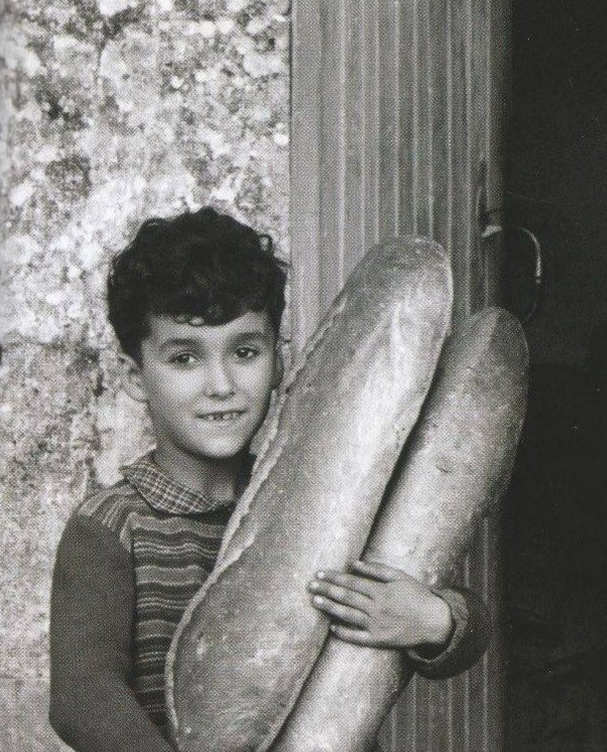
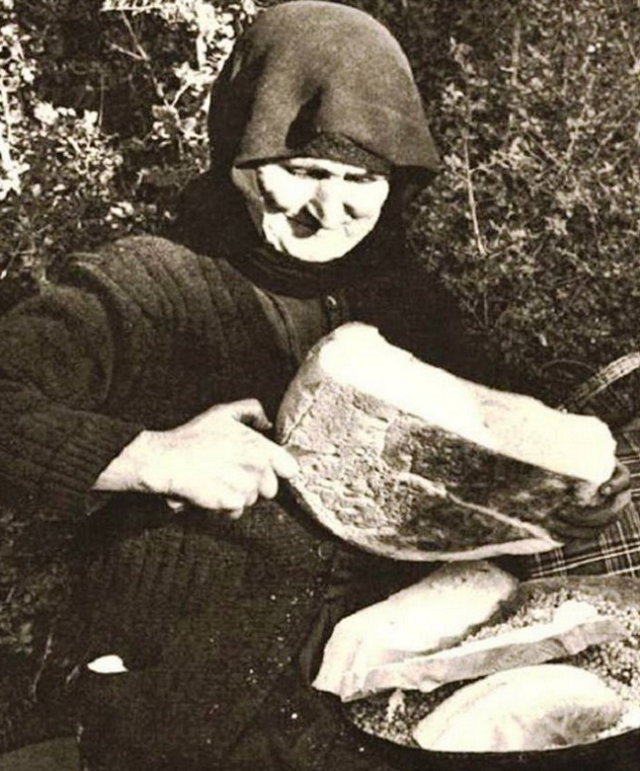
Με το πέρασμα των αιώνων, το ψωμί πέρασε από διάφορες μορφές και χρήσεις. Η σημασία του, μικρή στην αρχή ουσιαστική αργότερα, έπαιξε το δικό της ρόλο στη διαμόρφωση όχι μόνο των διατροφικών συνηθειών του ανθρώπου, αλλά και της κοινωνικής και πολιτιστικής συνοχής σε όλα τα μέρη του κόσμου.
zimi 12
zimi 13
zimi 15
zimi 21
zimi 22
zimi 25
zimi 31
zimi 44
zimi 66
zimi 77
zimi 67
zimi 90
zimi 91
zimi 111
zimi 112
zimi 113
zimi 1221
zimi 36
zimi 555
zimi 556